Showing posts with label DGM. Show all posts

Thursday, 25 September 2014

Dave Graffam Models 08 - Frontier Barn

This post is about my build of Dave Graffam Models' Frontier Barn, currently a 'silver best seller' on Wargames Vault and available for £2.42.  As with my more recent posts, I've again used Ironclad Miniatures' 28mm Tobias miniature  as a size indicator.


This first pic to the right shows the finished build. I've made a few changes to the supplied model in my build - specifically the first (2nd to the US) floor doorways and the grille in the centre of the roof. The model has parts for a small tower to go on the roof's centre and solid walls on the first floor. I decided to add the first floor doorways to give the building more versatility in a firefight.
The second pic on the left shows the door to the hayloft. As designed the building has only one of these (at this end of the building) which has a porch like structure, which I didn't build (couldn't be bothered with it tbh!).
This pic shows the other side of the barn. On this side I chose to have a double door - the model allows for a double door on any and/or all sides of the model, giving great versatility and many rebuilds. You can also see in this pic the small extension that is part of the model.
As usual (now) with my builds, I made the walls from 5mm foamcore and the removable roof with 2mm mounting board. Most DGM buildings don't come with interiors, but it's (relatively) easy to use exteriors as the interior as I've done here. I used the 'Gray-Green' layer of the pdf file for the exterior and the 'brown' layer for the interior, intending to give a contrast indicative of weathering. I'm quite pleased with how it's come out! As with the Finger and Toe Multi-Storey Warehouse I used 2mm mounting board to create partial floors allowing access to the entire building while mini's could be placed beside windows. I used wooden floor prints from DGM's Low Ruins Paper Models Set to cover the partial floors. For the earthen floor of the barn itself I used a plain earth print from DGM's Garden Ground Tiles

 This next pic shows the interior of the barn's extension and the edges of the foamcore used to make the walls. If I could be bothered, I'd stick some wood effect print on them, but I'm happy with colouring them in with permanent black marker.
Finally, here is a whole build shot with the roof removed. Unfortunately, Tobias seems to have escaped from this shot ...


In other news ... I placed my first non-solo wargame in at least 2 years on Monday evening. It was against Keith Armstrong - the megalomaniac behind the excellent Armies Army 15mm miniatures - at the Guildford Wargames Club. It went exceedingly well and is, I hope, the first of many such games.

Friday, 1 August 2014

Dave Graffam Models 07 - Coach House

The first detailed report on my recent building spree covers Dave Graffam Models' Coach House (curerntly a 'Copper Best Seller' and a 'pay-what-you-want' product on Wargames Vault).

In my last post on a Dave Graffam Models' (DGM) build ( dave-graffam-models-5-low-ruins ) I said that I was using 2mm board as a building material.  Since then, however, I've become disenchanted with that as it looked too thin next to 28mm models. I've now started using 5mm foamboard for the walls instead (which looks much better IMO!), although I still use 2mm board for roofs.

As you may be aware, DGM use the 'layers' functionality in Adobe Acrobat to provide the builder with many different options for the model's surface finish and placement of doors and windows. For this version of the Coach House, I decided on the 'brick' finish and not to use the 'Coach Door'.

In the first pic to the left you can see the north wall of the model. I've cut through the foamboard to create openings where the windows and doors appear on the prints of the model and coloured in the exposed white foam with a permanent black marker

To the right is a pic of the building's southern wall, again with the windows cut out, although the one at the peak of the wall was too small to bother with IMO.
The unfortunate thing about DGM buildings is that they do not come with any interior detail at all, so if you want to use the interior, you need to come up with something to use there.  This pic shows what I've done. The wooden flooring is from DGM's Low Ruins Set, while the interior walls are the Coach House's walls with no 'wall' layer selected. This gives an off-white finish to the wall with green and grey streaks that - to me anyway - looks like a neglected plaster finish. It's far superior to leaving it as bright white foamboard anyway! You can also see that I've 'framed' the openings in the walls with black marker

This second pic of the interior shows what I've done with the first (or second if you're American) floor. With previous builds, I'd made a removable floor (as you can see at the end of this post - dave-graffam-models-1-pub), but, through use, I'd found that unsatisfactory (constantly having to remove it to get to the ground floor and having it discarded on the table when not used, being 2 reasons). So now, I've decided to make a platform from 2mm board that I rabbeted into the foamboard wall where there are windows and covered it with bits of the low ruins floor piece. I hope that this solution will be more satisfactory.

This final pic shows the interior of the ground floor. You can see that I've not made any furniture for the build, nor do I intend to.  It struck me as I was beginning this series of builds that my aim is not to create detailed model buildings, but rather create terrain for wargames - hence the lack of furniture. Following this logic, I am unsure at present whether or not to put doors on the buildings ...  I might do so as they could be useful for zombie games - i.e. to indicate if the door is shut or not.

I think that I will (at some point!) build another version of this building actually as a Coach House! :)

Thursday, 31 July 2014

even more buildings and 2 bridges

For once I've managed to keep to a target for posting!  Below you can see a group shot of the more recently constructed buildings that I'll be posting on.  This time though, I'll tell you what they are!
At the back is a World Works Games' Swift Scenics range Office Block, in the centre front is a Finger and Toe Models' Multi-Story [sic] Warehouse and that is flanked by two Stoelzel’s Structures The Cottage. Unfortunately, the last three do not have (yet!) finished roofs ...  As threatened, the BTD British section is deployed to the front.

I tried to get the pictures for the first building post as well last night, but was having real problems with lighting :(  As it was only bridges that I used for the test shots, I thought I'd post them anyway, so here they are - again with the infantry included
Both bridges in the pics were constructed from Dave Graffam Models' Covered Bridge. As with all DGM products, the 'layers' included in the files allow for a wide variety of finished models.
I think that I'll be making at least one more bridge from this set - a 1" wide wooden bridge with a stepped approach (as you see in the pics, both of these have ramps) to use as a footbridge.
I made both of these with 5mm foamcore, except for the ramp surfaces and vertical sides of the brick bridge which used 2mm mounting board.

The kit includes layers for cobblestone, wooden, medieval brick, victorian brick and stone bridges, but no tarmac surface. Also the only sides included are wooden, but I reckon you could make brick or stone sides from the bridge surface.  It's set up for 2" wide bridges, but again I think you can make wider bridges without much difficulty. In fact, I think I'll have a go at that myself at some point!

Finally for this post, thanks to all of you who've made such supportive comments on these recent posts - they are both very much appreciated and very helpful - thanks guys!

Tuesday, 22 July 2014

Buildings ...

Not much of a post today ... some 'teaser' piccies of the buildings that I have most recently assembled. These are 'group' shots with multiple buildings in each and I intend to do a more detailed post on each of them. As well as the buildings below, I have put together some 'ruined' buildings, and I'll do some posts on them after the buildings.

These are all 28mm-sized and are Dave Graffam Models made with foamcore as the main building material

Apologies for the quality of the 2nd & 3rd pics - I took them this morning just before leaving for work and them seemed to be ok on the camera view-screen :( ... anyway, hop you like them!


Tuesday, 10 December 2013

Building Again ...

For a variety of un-interesting reasons, it's taken me a while to post once more; sorry guys (& any gals that might be there!)

Hobby related stuff that I have been doing recently is creating more buildings from print & build kits that I've got via Wargame Vault.

Having played - & thoroughly enjoyed! - WW2 skirmish most recently, I decided that I wanted to have a ruined village. As a result the first model I put together was Dave's Games' Wrecked House. You can see the first pic of this to the right with Zed-Me in front to show the size. The model assumes that it will be made from card, but I used 5mm foamcore for the walls as card (or 2mm mounting board that I've used previously) simply is not thick enough to seem 'right' with 28mm models. This meant having to cope with the inner walls each being 5mm too long; not a problem, but definitely something to consider if you do the same


 I've also decided (at the moment) not to put half the roof in place (as you can see to the left). The roof is made from 2mm mounting board (basically just 2mm thick card from Hobbycraft), as it 'seems right' for that to be thinner than the walls. The floor is foamcore, but I've put a layer of board under that. I made it larger than the model's "footprint" as I was intending to add scenic bits to it, but I'm not so sure now as that will make it harder to store safely - always a problem ...
Finally - for this build - to the right you can see the staircase as I've made the first* floor removable - not a standard feature of the build. To do this, I had to glue the roof piece in place, but I'm happy with teh result.  I'm going to cut down the board under the model so that it is a rectangle of the model's size (IIRC 6 x 9 inches) and cover the exposed corners of the board with some kind of 'rubble'.

*- I believe those on the wrong side of the pond would call it the second floor
Next are 2 versions of Dave's Games' Ruined Longhouse. This shows the versatility that the 'layers' in Dave's Games' models gives to all their products. Buying one model gives you access to lots of different appearances for your builds. Again, I made the walls from foamcore and and very happy with the result.


Sometimes though, this very versatility can cause problems ... with this build to the right, it wasn't until the final assembly that I realised there was no door! Easily remedied though, by hacking a hole through one of the end walls!
Waaay back in this post: dave-graffam-models-5-low-ruins, I posted about the low ruins I'd made.  I've never really been happy with them due to the wall thickness I mentioned above. So, I've made another couple of them using foamcore instead and they 'feel' much better.  I've used the same options for them, so at first glance they look identical, but have put different internal walls in them.
The internal walls aren't part of the kit as standard, but I just printed some extras walls with 'yellow concrete on both sides and then hacked them about until I was happy with them

This time though I've cut out the windows and doors and they look better for it!


Finally, to the left is a snap of the ground floor of my next build as a tease ... anyone recognise it?

Friday, 15 November 2013

Last Friday's game

Last Friday evening I went to my local club - Farnborough Wargames Society - and played another game of Platoon, the club's WW2 skirmish rules derived from Peter Pig's PBI2 rules.

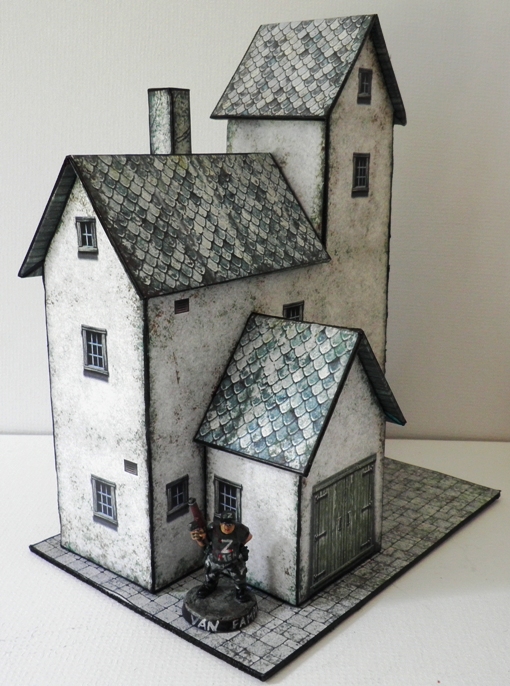
I took more pictures this time (as you can see)! The one to the right shows my Germans in a piece of club terrain (in the centre) and one of my Dave Graffam Models' Low Ruins builds in the corner (more about that excellent model is in this post: dave-graffam-models-5-low-ruins).


 To the left you can see Graham's British Para's (with my medic) at the start of the game. The game works on activating (by a d6 roll) the figures in a particular 6" square, the result giving the number of action points available. Casualties and being under fire give penalties, which is why there's a dead para and a rifle -1 marker in the square. The casualty markers do give a good look to the game - IMNSHO of course!
This pic gives a larger view of the centre of the table and as well as 2 of my low ruins, the roofless building is one I 'bashed' from Dave Graffam Models' Village Pub (more on that in this post: dave-graffam-models-1-pub).  The 2 buildings closest to the camera are held by my German section, the 2 by the centre crossroad hold Graham's British Para's and the one at the top has Alec's German section. This is where things started to go very badly indeed for the Brits
Graham's hand is in the pic to the left as well as my section in the centre bottom. In the wood to the right side is part of Neil's section, the rest in the building at the bottom right corner ... despite Neil's section in those 2 places and Graham's in the low ruin to the centre left, as well as the Brit Vickers MMG in the ruin by Graham's arm, the Brits were unable to force my section out of their ruin ...
Here we have a closer view of my section's position; having both buildings allowed them to support each other, as well as leading the Brits to split their fire. I tried to concentrate mine on Graham's section, only putting the occasional suppressing burst into Neil's. The 'pinned marker' (helmet on a rifle) in the left side ruin with Graham's section indicates that their last activation gave a 'Panicked!' result, which is the worst you can get and gives a penalty for their next activation ...
And here we see the buildings that had been occupied by Graham's section after the combined fire of Alec's and my section finally drove them out just before I occupied the ruin ... victory was close!
Victory achieved!! The remnants of the British Paratrooper platoon huddle in the ruin to the right. Strictly speaking I should have shown Neil's section who didn't have a casualty IIRC, but this pic went through the propaganda machine ...

A really fun, enjoyable game and it was great to get some of my figures (I provided the German force - an infantry platoon of 3 eight man sections, plus command and 80mm mortar) as well as some of my buildings on the table.

No game this week as I have my daughter, but I will be at Warfare tomorrow wearing my t-shirt with my blog address on the back - if you see me, say hello!

Finally for this post, last Friday at the club David and Gordon played a game of Too Fat Lardies' Sharp Practice. It was a Napoleonic British Naval landing party trying to destroy a French semaphore station. The table looked splendid:

But the thing that really caught my eye was Gordon's launch:
It looked great! He said he'd had it '30 years' and that it's still available!!  I'm tempted to get one myself, but I couldn't finish it as well as Gordon has ...

Friday, 15 June 2012

Dave Graffam Models 6 - Clock Tower

So another DGM, this time it's the Clock Tower.  As with all the other DGMs I've posted on (see this page for links to the posts: Buildings), the layers technology in the pdf files from DGM gives a whole world of variations for this building.

Note: I use Foxit as my pdf viewer of choice, but I've had problems when attempting to print layers with it, so use Adobe Reader to print DGM files)

Once more the hurtful critic valued interior designer Van Fampi is appearing in the photos to give a sense of scale and add his own comments.  I went for the 'red brick' option on the outside of the tower, and this time, have cut out both the single door and the windows that I chose to put on the tower (with the layers you can have different windows and doors in different positions). Also, I printed the clock itself a couple of times and mounted it on a piece of board to give it a 3D appearance, but I'm not sure how well it comes across in the pic:
"Wow! An openi door - at bl**dy last!"
As you can see, I put a ruler in the pic to show the height of the tower.

I also 'bashed' the build a bit. As you will be aware if you've read the other DGM posts I've done, you will know that the DGM models have no interior detail supplied with them. However, for 2 reasons, I added some at the top of the tower:

  1. It made such a perfect sniper/lookout spot I felt I had to
  2. Van Fampi threatened me with physical violence ...
So you see I had to. Anyway, this next pic shows what I added. I put in a floor with a trapdoor and papered the walls with interior detail from Worldworks Games' Mayhem Apartment set: The pic also shows - just how I did the clock:

I do like this build, but I'm really not sure how I will use it. As it is, it is quite top-heavy (especially with a figure in that room!), which means the slightest touch of an arm during a game will send it over. The model does come with a small 'foot print' - which would definitely help - but I have not attached it yet, as it would prevent placing the tower next to a building - something I'm considering.

Anyway, I'll post again on the tower if I have a brainwave and devise a solution!

Monday, 28 May 2012

Dave Graffam Models 5 - Low Ruins

Another post on my Dave Graffam Models (DGM) builds. This time 2 builds I've put together from the 'Low Ruins' product. I did wonder whether to post on these builds or not, as Vampifan the Great (VtG) had already made a post on his build (here: daves-games-low-ruins-and-crosspiece ), but I decided to in the end, to show the great versatility of DGM, through their use of layers in pdf files.

Just a couple of points on my DGM builds:
  1. All my DGM builds are printed from the file onto A4 paper by a colour laser printer, which is then cut down to the size of the prints
  2. The prints are then glued - for the first couple of builds with PVA glue, but latterly using a glue stick - onto Rymans' stationers Oil and Acrylic Board (which is 2mm thick)
  3. The board is then cut to the paper's dimensions with a craft knife.

Anyway, as with my previous DGM posts, Van Fampi - the interior design consultant of legend - has once more consented to be present to give a scale indication in the pics. This first pic shows the side elevation of the first build, which is a 6" x 6" model. The interior wall for this build is made from the Low Ruins file - VtG used components of the Crosspiece Ruins set for his - and was added for support and a bit more cover. Having seen VtG's build, I'm thinking of adding some more interior walls.
"What a surprise - no see-through windows or opening doors!"
This next pic shows the same build at another angle. You can more clearly see the rubble layer that can be shown on the floor (if desired), mainly in the corners. At some point I'm going to use some model railway ballast/gravel to build this up.
" ... hmmm, I'm liking therest of the interior, though."

For this next 'Low Ruin' I chose the 6" x 4" footprint and the brown brick exterior (the first had red brick). Again this build has the rubbled floor.  This pic clearly shows that I have used black marker pen to colour in the cut edge of the paper and board. It doesn't - IMHO - look particularly fantastic. My idea is that it represents soot - or something like that anyway - to give the suggestion of fire damage. I might try painting the edges a more appropriate colour at some point. (I think VtG painted his grey.)
"Once more - disappointing .... "
I've just checked and there are 9 different layers that can be used for the walls of this build (or 10 if you include 'no layer') and 8 different floor layers (again 1 extra if no layer is counted) making this an incredibly versatile model, that I'm very pleased I bought.  This last pic is another elevation of the 2nd build.
"Not bad, I s'pose - apart from the usual of course ..."

The only slightly negative point is that it can be a pain to make sure you are lining up the doors and windows correctly when you print! Against that, of course, is the incredible versatility of the model and the fact you can use the floor piece as flooring in different models - as I did with my DGM Village Chapel here: dave-graffam-models-2-village-chapel and DGM Pub here: dave-graffam-models-1-pub

Friday, 25 May 2012

Dave Graffam Models 4 - Split Ruin

Another of the extensive range of Dave Graffam Models in this post. This time it is the Split Ruin, again using Van Fampi as an indicator of size. Although it may seem quite basic, this build was the hardest I've done to date because of the differing shapes and many, many cuts needed.  At their most basic, the other builds could be described as boxes, with more or less square/rectangular sides, so cutting them with a steel rule and knife is - compared to this model anyway! - fairly easy.

When you look at the jagged edges of the 3 floors, 3 walls and roof of this build, I hope you can imagine just what a pain it was to do. Having said all that, it is a nice model and I'm glad that I have it! So here is the first pic, showing the 'inside' of the ruin:
"Well this looks promising ... fully detailed interior, trapdoors cut out - good start!"

As you can see there is a lot of 'internal' detail for this build, and with the layers used by DGM, an wide variety of possible combinations.

This next pic shows an end elevation of the build and that, as before, the doors aren't cut out ...
"What's this?! A non-opening door! after such a promising start ...."

This final pic shows the roof - or what's left of it! - of the build. For me this is the 'disappointing' part of the build ... the printed roof tiles just aren't convincing.  That is being quite picky though, and I am happy with it. Anyway, back in this post - shopping-wmms-part-2 - I showed a photo of roof tiles that I'd got from Warbases and I intend to use those to give a better look to the roof.
"P'fah! Solid windows AGAIN! I despair, I really do ..."

Monday, 21 May 2012

Dave Graffam Models 3 - The Cottage

At the end of my last post, I said I'd do another Dave Graffam Model post and gave a choice of 3. In the comments on that post, The Extraordinarii voted for The Cottage, so that's what I'm putting up this time.

So here it is, inspected as before by Van Fampi - still a world renowned interior designer, but there's no interior for him to criticise this time!  This was the first of my DGM builds and it was very unambitious. I glued the roof on this one and used some old fag packets I had kept for just such a purpose to glue the card walls to. Anyway, the model itself is quite ... 'strange' in its design (IMNSHO obviously!), and I'm not entirely sure how it can be a cottage.  Bearing in mind that this build is entirely as supplied by DGM and I've not tried to make any bashes/or customisations to it, it is impractically thin, as you'll see in the pics below. I used none of the surface texture layers, hoping to give it a plastered/whitewashed feel, thus increasing the model's potential periods of use - e.g. ECW for Witchfinder, early 20thC for 7TV, etc

Anyway, the first pic shows the main entrance with Van Fampi to give scale
"No opening doors?! huh! amateur build!"
From this angle you can see what I mean by 'thin' - at least I hope so!
"Can't look through the windows either ..."
This is the 'rear elevation'
"Another non-opening door and more 'windows' - pfah!"
Finally the last elevation showing the cottage's tower ... well known for towers are cottages ... aren't they?
"Well it will be alright as a space filler ... I SUPPOSE!!"
I do like this model, but I'm don't believe that 'The Cottage' is the right name for it ... not that I have a better name that is! I reckon I'll probably build another at some point with an interior, but for now, I'm quite happy with this one.