Monday, 21 May 2012

Dave Graffam Models 3 - The Cottage

At the end of my last post, I said I'd do another Dave Graffam Model post and gave a choice of 3. In the comments on that post, The Extraordinarii voted for The Cottage, so that's what I'm putting up this time.

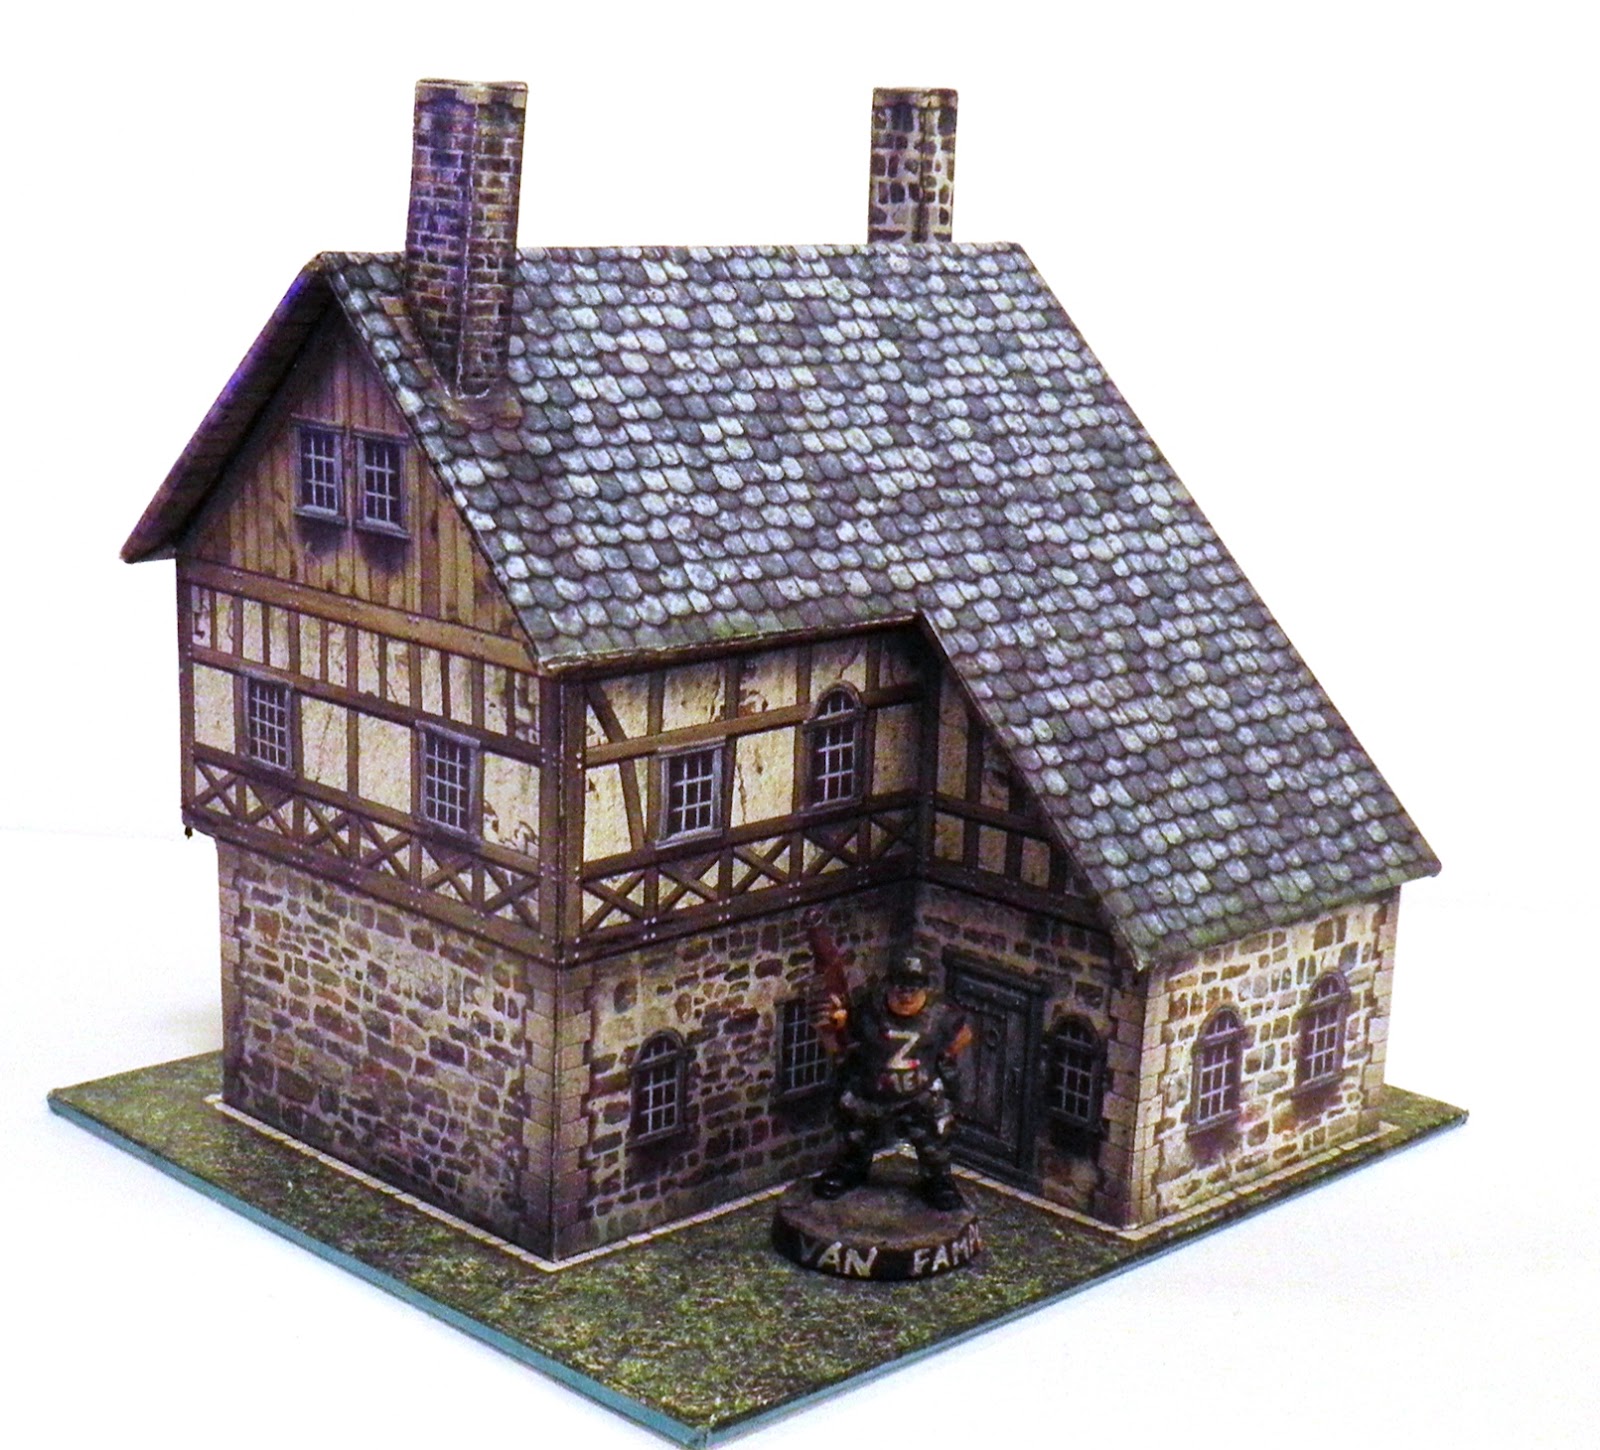
So here it is, inspected as before by Van Fampi - still a world renowned interior designer, but there's no interior for him to criticise this time!  This was the first of my DGM builds and it was very unambitious. I glued the roof on this one and used some old fag packets I had kept for just such a purpose to glue the card walls to. Anyway, the model itself is quite ... 'strange' in its design (IMNSHO obviously!), and I'm not entirely sure how it can be a cottage.  Bearing in mind that this build is entirely as supplied by DGM and I've not tried to make any bashes/or customisations to it, it is impractically thin, as you'll see in the pics below. I used none of the surface texture layers, hoping to give it a plastered/whitewashed feel, thus increasing the model's potential periods of use - e.g. ECW for Witchfinder, early 20thC for 7TV, etc

Anyway, the first pic shows the main entrance with Van Fampi to give scale
"No opening doors?! huh! amateur build!"
From this angle you can see what I mean by 'thin' - at least I hope so!
"Can't look through the windows either ..."
This is the 'rear elevation'
"Another non-opening door and more 'windows' - pfah!"
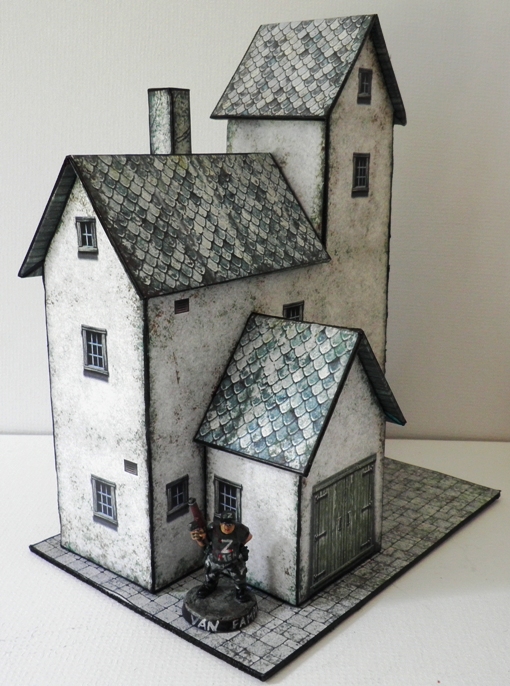
Finally the last elevation showing the cottage's tower ... well known for towers are cottages ... aren't they?
"Well it will be alright as a space filler ... I SUPPOSE!!"
I do like this model, but I'm don't believe that 'The Cottage' is the right name for it ... not that I have a better name that is! I reckon I'll probably build another at some point with an interior, but for now, I'm quite happy with this one.


Friday, 18 May 2012

New Toys from Salute 2012 - pt 3

So, the third part of my haul of new toys from Salute 2012.  This time, we have spaceships from the Iron Stars range by Brigade Models along with a few from their 'Cimexian' bug spaceships range.

I'm not entirely certain why I decided to paint these first, but I've now finished them, even getting the dip applied. Originally, I was going to follow the paint schemes from the Brigade site, but I decided to have something a bit more colourful in the end. So, for the Austro-Hungarians, I've used Burgundy with Pale Flesh (btw, that's my zombie skin colour!) for the ships themselves and Copper for their Cavorite sails:
Austro-Hungarian Empire
 And for the Russians, I've used Field Grey with Porcelain Blue for the hulls and Blue Steel for the sails:
Russian Empirs
While the bugs are quite a bit brighter as I wanted them to be markedly different, so they have Heather, Pink and Scarlet:
Bugs!!
One thing that I did not know until I had the ships is the amount of detail on the underside of the bug ships, so here's a shot of that:
Detail on underside of Bugs
I was very impressed by all these models, although getting the sails to stick on the Russian small ships was a real pain!

Next time: another Dave Graffam Model build which will be one of: 
a) The Cottage, b) 2 Low-Level Ruins, or c) Split Ruin
 - stay tuned to find out which!

Wednesday, 16 May 2012

Finished the Spaceships

Due to a ... erm ... 'health issue' yesterday, I left work about 1.30pm and was at home asleep by 2.10pm (with medicinal aid it should be admitted) and woke up just after midnight.

Not feeling able to take pictures, I've none to share in this post, but I did manage to finish the spaceships I bought at Salute, including applying magic dip before I left for work.

So I'll get some pics of them tonight for a future post along with the Dave Graffam Models' (DGM) Cottage I forgot I had (and the DGM Split Ruin that I had still forgotten when I edited my last post!)

And will do my damnedest to get pics of the Offensive Miniatures I'm trying to part with over on the Board of the Living Lead, where the best zed-gaming bloggers can be found!

Monday, 14 May 2012

Dave Graffam Models 2 - The Village Chapel

The second of my posts on Dave Graffam Models (DGM) has the Village Chapel as its subject. Although I have a lot of the buildings available from DGM, the Pub, Village Chapel and a couple of the low ruins (reviewed by Vampifan the Great (VtG) in this post: daves-games-low-ruins-and-crosspiece ) are the only ones I've built so far, so this will be last post on DGM for now - unless anyone wants to see my attempts at the low ruins?

Anyway, the Village Chapel. In this first pic, you can see the sheer size of the finished build; that teeny-tiny figure in the foreground is Van Fampi, the same renowned interior designer who appeared in my post on the DGM Pub ( dave-graffam-models-1-pub ).
Van Fampi arrives to cast his critical eye over the chapel ...
As it is a BIG build, I made a change to it in an attempt to ease storage - namely the steeple is removable and fits inside the main body of the church when not in use. Speaking of removable parts, this next pic shows  all the roofs removed along with the steeple taken off and you can just about see my beginning of applying interior decor. I (and VtG) have mentioned the layers used in DGM models and the interior wall you can see below shows this at its best I think. I've used the exterior wall, with all layers hidden, except for the same windows I used when I printed the exterior walls. IMO this creates a great plaster/whitewash finish, with a bit of accumulated dirt. You can also see on the floor some of the other bits that I've printed to finish the interior.
VF is a bit surprised to see it fall apart around him!!
In this close-up of the interior, you can see the wall more clearly and also the interior of the small annex. The flooring I used is from the DGM Low Ruins (IIRC!), and I think it fits very well for the floor of a chapel.
"Well, I mean to say ... the floor is ok, but the walls?!
the windows can't be seen through and don't get me started on the doors!!"
In this final pic that shows the interior of the foyer, you can just about make out that I've finished the decoration in this part. As it stands though, it was pretty pointless to do that, as it's damn difficult to get your into, so you can't place and/or move figures! I'm contemplating cutting the doors out though to enable much easier access.
Van Fampi is very glad to leave this half-finished build ...
FYI: The model - including butresses, foyer, annex and steeple - is 33cm long, by 18cm wide and 35cm tall

This is another great model from DGM, that I'm glad I got. It is very imposing when built, and using the layers once more, you can have a "stone" finish (as I've used), brick or clapboard (wooden planks) and as you have the options of foyer/annex/tower or not you can have many different builds.

edited:  I forgot, I have the DGM 'Cottage' assembled as well, so I may well do a post on that

Tuesday, 8 May 2012

Dave Graffam Models 1 - The Pub

Back in a comment on this post daves-games-low-ruins-and-crosspiece on Vampifan's (hereafter VtG for Vampifan the Great) blog, I threatened to do some posts on the Dave Graffam Models that I've got and assembled; specifically the village chapel and 'cottage'. Well, they will be posted on at a later date; for this particular post the subject will be the Pub model.

I've chosen to do this first as the way I've used it highlights the great versatility of the products sold by Dave's Games. From the same pub model, I've made a 28mm pub, a 15mm pub and a pair of semi-detached cottages; pictures of which follow ...
'Front' view of pub

To begin we have the 28mm Pub I've made. In these first couple of pics, unfortunately the roof is off centre - oops! Anyway, for this particular incarnation, I chose red brick walls, slate tiles, to use the extension, tiled base and stone edges - all of which are the 'layers' that VtG wrote about in his post. Other options include a thatched roof, gray brick walls, various 'tudor' options, grassed base, etc. (see 15mm pub below for some of these). I put the door in the end of the extension, and you can see 'Van Fampi' (28mm mini from eM4) here as scale

Which door? too many choices ....
Another view of the same build showing the other door I placed on it (with the layers you have options for how many doors and where they can be placed). You can see quite clearly here how the roof is offset too far.

'Romeo, wherefore art thou?! ...'
In this final pic of the complete build, you can see where I've placed the (once again!) optional balcony. Also, the marker on the roof, where I've yet to add the second chimney. As you might expect by now, the chimneys are optional and can be in multiple places.


'Hmmm ... needs a coat of paint at least!'

This was - IIRC - the third or fourth build that I put together, so it was the first that I've 'experimented' with. I tried to make the floors of the build seperate to ease access when used in play, and to the left is a pic of the first floor when the roof has been removed. You can see there is no interior detail nor are the windows or balcony door cut out - something I'm going to rectify in the future (honest!). None of the models from Dave Graffam have any interior detail ... and you can see the interior designer par excellence Van Fampi is not happy with this ...

'Well it's better than nothing ... I guess ...'
In the ground floor pic to the right and the one below, I've attempted to avoid the wrath of Van Fampi by adding detail. The interior 'wallpaper' is from Worldworks Games' Aprtments and though not entirely 'right' for this build, I'm happy with it. Again I still need to cut out the windows; I should have done this befor sticking it all together ... it would have been much easier!
'Needs carpet or vinyl - Something!!'


So now onto the 15mm version. I made this by printing the files at 50% of normal size, and although I used the slate roof and extension options again, you can see that the first floor is 'brown tudor' this time and the attic is timbered - both were brick in the 28mm build - and the door on the extension is in a different place. I guess I should've put a 15mm figure next to it, but Van Fampi started sulking so he's here again. There's only the pic of this build as it doesn't come apart at all - even the roof is glued on.
And now to the cottages I 'bashed' from the Pub building. I wanted to have a small village that all looked to be the same style, so I've got 4 of these pairs assembled now, but as this is the only one with any interior detail, I've only taken pics of it. As you can see, I have cut the windows out of this and it was a real pain as I did it after I'd assembled it.


 'Let's hope this is better!!'
'Well ... nope - just as bad, not even any stairs!'

'Repetitive, unimaginative - needs work!'

Next time I post on DG Models, I'll do the Chapel - honest!

As a teaser for my next post though, here is one of the spaceships I was painting over the long weekend ...

Thursday, 3 May 2012

A change in my basing method

Way back in this post :- how-i-base-my-figures, I described the process I have been using for years to base my wargaming miniatures for years.

As you can tell from that post, I've used DAS modelling clay, but have frequently read of other gamers' use of 'Terion' and other fillers, although I've not seen 'Polyfilla' referred to for some reason ...  So when I was in one of the local 'cheap' shops a couple of weekends ago and saw a ready mixed pot for £1, I thought I'd get some and give it a go.

Well, I have to say that I'm very glad I did! It is much easier and quicker to use than the clay has ever been and I shall be using it from now on! I use an old knife to apply it in a 'trowel-like' fashion  and have so far had excellent results with it.

For the spaceships I'm currently constructing, the adhesive qualities of the filler have proved a great boon. With the clay, I had to glue the multiple bases and washers (that I use to add weight to the base for stability) together and wait for them to dry. With the filler, I'm using a thin 'spread' between each 'layer' and that sticks them together superbly!

I've got no pics of it in use at present, although this pic (that I posted in my missing-pic-and-progress post) does show that the horse has filler on its base:


So I guess, if enough people tell you that their method is good - it's worth trying it yourself to see!

(Regarding the spacehsips, I spent last evening drilling them for the bases I'm making for them and hope to start gluing them together tonight. I'm even going to try a bit of soldering on one base!  Hopefully I'll get some pics and post them soon.)

Tuesday, 1 May 2012

Edwardian Spaceships and 'War of the Worlds'

In my post 'new-toys-from-salute-2012-pt-2', I ended with a threat to post about the Edwardian spaceships that I got at Salute. Well I've been cleaning them up but - and I have no idea why - haven't been able to bring myself to glue them together as yet :(

So, rather than put pictures of them up, I thought I'd give some more information on them instead, as a mild teaser, perhaps. They are all from Brigade Models' Iron Stars range - specifically the Austro-Hungarian and Russian models - and were designed for use with Majestic 12 Games 'Iron Stars' rules. I've had these rules for longer than I care to admit, and despite really liking them and the background within them, I've never done anything with them :(  ... so, I resolved to change that before Salute and ordered a pile of the ships which I got from Brigade at the con.

The 'World of Iron Stars' is one where Cavorite was invented in 1899 and the Martians invaded - but unlike HG Well's story, here their cylinders landed not just near London, but also by Paris, New York, Chicago, and Berlin (yes - M12 are an American company ...). Add in a few political consequences of the Martian War occurring at the same time as some terrestrial conflicts (e.g. the Boxer Rebellion and the Boer War) and the Earth is very different to that of our history ...

I had thought that I knew the story of 'War of the Worlds' (having seen both films and listened to Jeff Wayne's musical version many times), but decided to actually read the book anyway as 'research' for Iron Stars.  

I have to say that I wish I'd read it a long time ago - as usual with books made into films, there is so much missed out and it is so much better! I'd recommend it to anyone interested in Sci-Fi or apocalyptic wargaming - apocalyptic wargaming due to the descriptions of a deserted London; very evocative.


Anyway, tonight I hope to make a start on assembling the ships and - if I do, I'll post some pics of them soon.