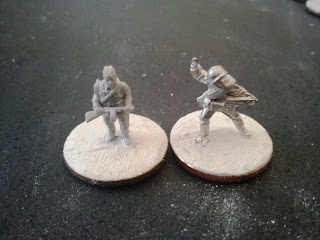
Anyway, gluing the mini's to the coins leaves an unsightly - to me - 'lip' so, many moons ago, I started using DAS modelling clay to hide this. Originally I could only find it in my FLGS but recently, since the FLGS changed hands, I found that you can get it in Rymans the stationers.
 |
| DAS modelling clay |
 |
| 15mm Plastic Soldier Co Russian and QRF Russian |
Then I take a piece of the clay and press it down onto the coin to hide the lip and smooth it out using a knife:
As you can see in the above pic, overlapping the edge of the coin is not a problem at this stage - in fact you should slightly overlap it. That way, when the clay has dried (the time it takes can vary depending on the ambient temperature - on a hot day it can be as little as an hour, but I ordinarily leave it overnight) run a knife around the edge of the coin to clean up the edge:
At this point the figure is ready for undercoating ... with these 15's I've been cleaning the flash - and mouldlines for the plastics - at this stage. I do the process in a 'mass-production' assembly line fashion:
I've also been using the clay to fill in the bottom of slotta-based figures for several years:
I find that this extra weight in the base gives the figure an added stability, as well as making it easier to stick magnetic sheet to the bottom. The figure in the above pic has also had the clay spread on top of the slotta-base to hide the slot and give a bit of texture.


